
A general understanding of how to fix plumbing issues can be wonderful for homeowners.
You can learn a lot when doing this kind of repair and gain more confidence working with tools, as well as experience. Fixing your fixtures yourself can also save you money and give you a sense of accomplishment.
However, as with anything at which you’re not a professional, you can also cause more damage than there initially was. Initiative and self-reliance are good until you make a mistake.
And for some people, a serious error, especially if it’s costly, can put a halt to the desire to continue learning, which is not the outcome we want to see. That’s why in this article, we will provide you with some pointers to avoid all that when it comes to tightening your plumbing fixtures.
How too tight can be too wrong
When performing this task, the initial instinct is to make it as tight as possible. However, there’s a list of reasons why this is wrong.
The main one is that an overtly tightened fixture creates significant stress that could crack it. A ceramic toilet, for example, is particularly at risk from this unnecessary practice.
Pipes can warp, bend, and eventually break – especially those with threaded connections. All these issues can lead to abrupt, messy leaks that ruin one’s day.
How to tighten your plumbing fixtures without damaging them
A good rule to follow is the “hand-tight” rule. It means that you tighten your fixtures and connections with your hands.
An optimum seal is achieved, but you still need to use tools when loosening. The purpose is that installation is tight and secure but not to the point of creating stress.
Practising this rule can prevent unnecessary damage alas, it is not applicable to all fixtures. For example, valves and compression fittings need a stronger seal to function correctly.
You must ensure you use the right tools too. Adjustable wrenches are great for differently-sized nuts and bolts, while socket wrenches offer the proper grip for pipe fittings and connections.
Be mindful of the teeth and serrations found on pliers, as their grip alone can cause damage. They’re mostly used for larger components where you want a non-slip grip.
Let’s look at some common cases and the right tools for them.
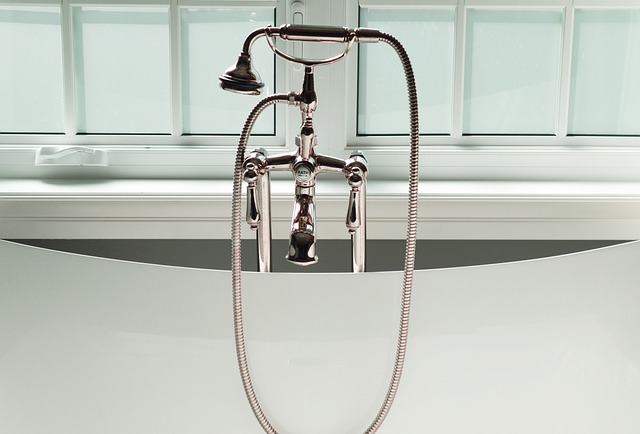
Tightening your faucet
A common basin wrench will do if you want to tighten the nuts underneath the sink. When trying to fix a dripping faucet and you want to remove the faucet itself, you need a spud wrench to ensure the grip won’t scratch the finish.
Tightening your toilet
As exemplified above, you can break a pretty nice ceramic toilet if you tighten it too hard.
This can be extremely unpleasant when it happens, especially if you’re doing some kind of renovation this summer, as it will put a strain on your budget. And with the current cost of living crisis, it’s the last thing you want.
The thing with porcelain is that while it’s hard and durable, it can also crack easily. This defining feature contributes to its brittleness, and so it will not withstand the stress created by an extra-tight installation.
General advice for tightening your plumbing fixtures
Doing your own repairs and home maintenance can be a wonderful thing. It will instil in you confidence over time and teach you much.
So, what are some of the best rules to follow when it comes to tightening your fixtures?
For starters, follow the “hand-tight” rule. You must also ensure you’re using the right tools to avoid surface scratching and other types of damage.
Using Teflon tape or any thread sealant is also advisable to get that good seal without resorting to torquing the fixtures. They’re also good for preventing leaks, which are one of the main reasons for attracting pests to your home.
Beware of stripping threads
It’s imperative to avoid stripping threads in pipes and fittings. Doing so when the connections are overtightened can permanently cause improper threads to tighten. You’ll then have to replace the connection or even the entire fixture.
Lefty loosey, righty tighty
Another general rule, but as it’s also catchier, it is easier to remember. You tighten by turning right or clockwise, while you loosen by turning left, anticlockwise. Remembering will often save you from confusion.
On the other hand, some connections use different types of threads that orientate opposite to the “Left loosey, righty tighty” rule. A fixture or component’s accompanying manual likely discloses this. You can just feel it out by applying minor force with your tool.
Keep your pipe fittings warm
Foam insulation is majorly recommended for keeping your pipe fittings warm. The thermal barrier maintains the heat and protects the pipe from harsh weather. It’s particularly risky for leaky pipes to be uninsulated because they can crack and burst once they freeze.
Other insulation types are magnetic and fibreglass insulation. There’s also pipe wrap, but its insulation is not as consistent as others.
Plumber’s tape
Once more, this is useful for securing your fixtures. Plumber’s tape, or PTFE (polytetrafluoroethylene tape), is a favourite tool due to its water, chemical, and heat resistance.
It’s also thin and flexible, which helps it wrap around fixtures and fittings precisely. You can find it at a relatively low price at almost any hardware and supply store.
Conclusion
Gaining experience handling your own repairs can be really rewarding. You will gain confidence in working with tools and maintaining your home, which is a useful thing to have.
However, it’s important always to start slow when learning about a new craft and leave the things you’re unsure about fixing to licensed plumbers.
That can ensure you will continue to gain experience but also keep the likelihood of costly repairs down to a minimum.
We hope that you learned a thing or two from this guide and will approach all home maintenance repairs confidently and with a desire to learn and improve your skillset.


Leave a Reply
You must be logged in to post a comment.